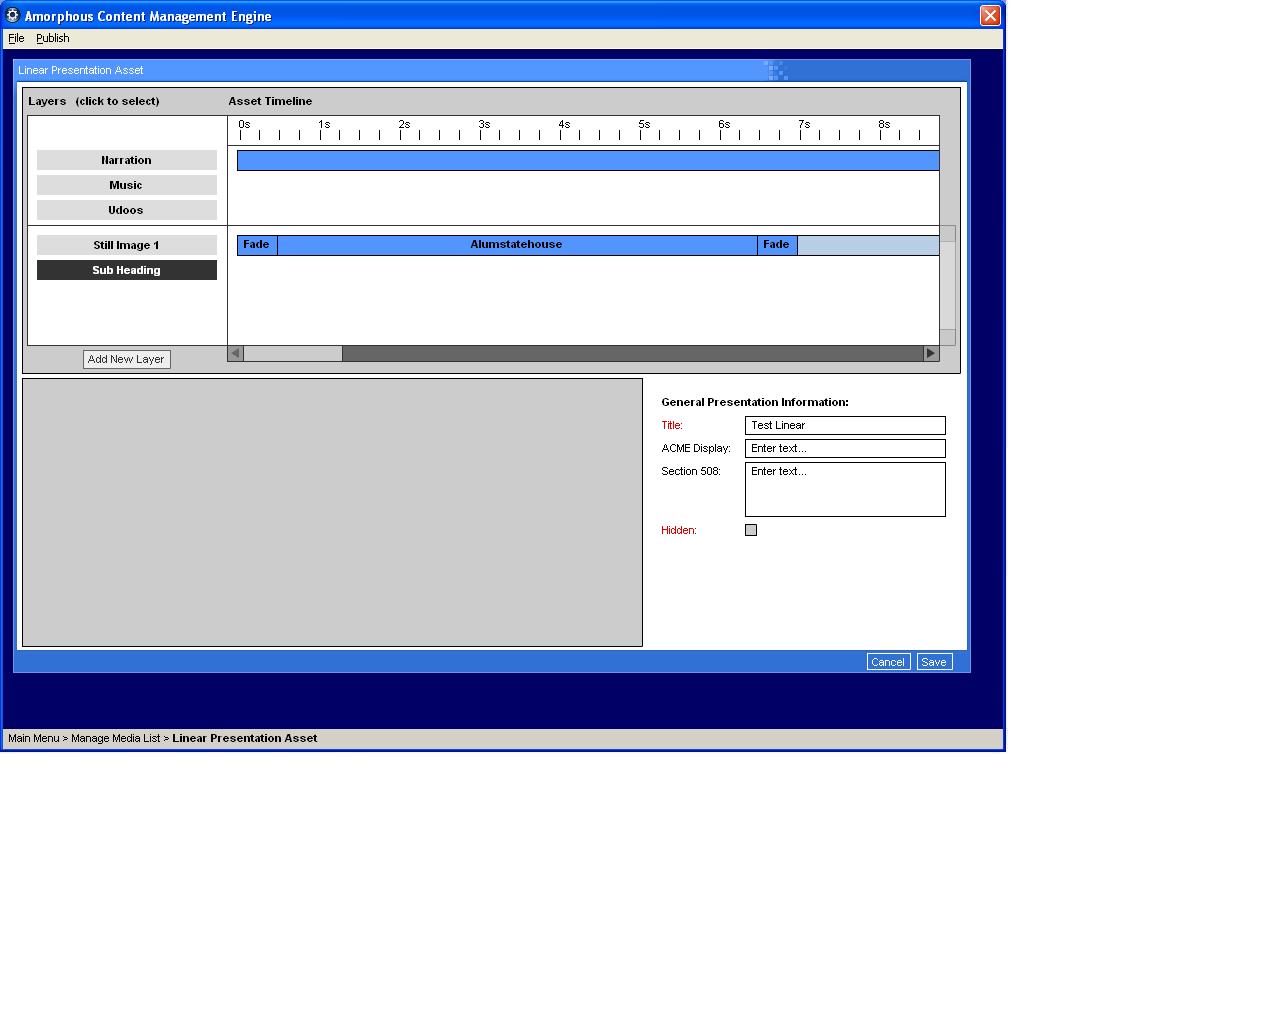
Linear Presentation Assets
A Linear Presentation Asset is a way of bringing several forms of media together.
To Create a Linear Presentation Asset:
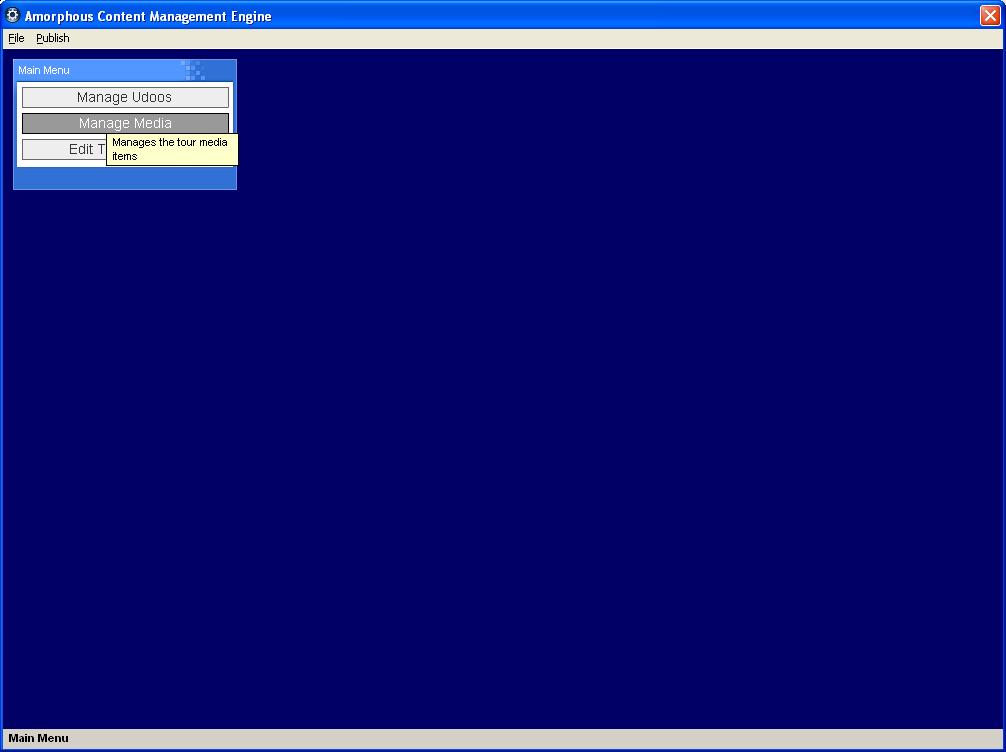
- Click on the “Manage Media” button.
- Change the Selected Type to "Linear Presentations".
- Click on the “Add Item” button. The Linear Presentation window should now appear.
- Put the title of the Linear Presentation in the “Title” box.
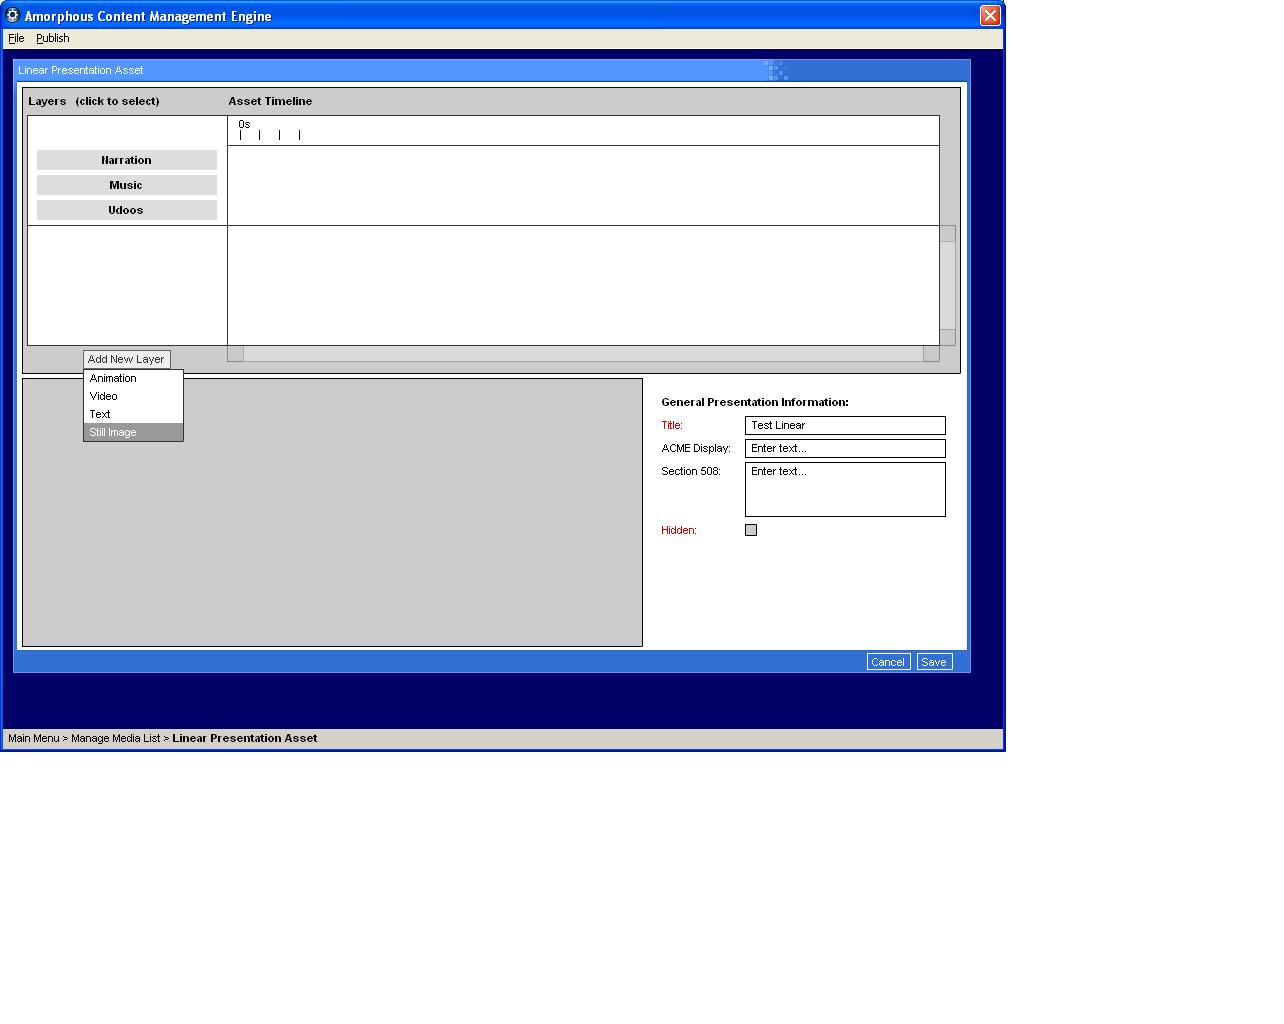
- To add still images to the Linear Presentation:
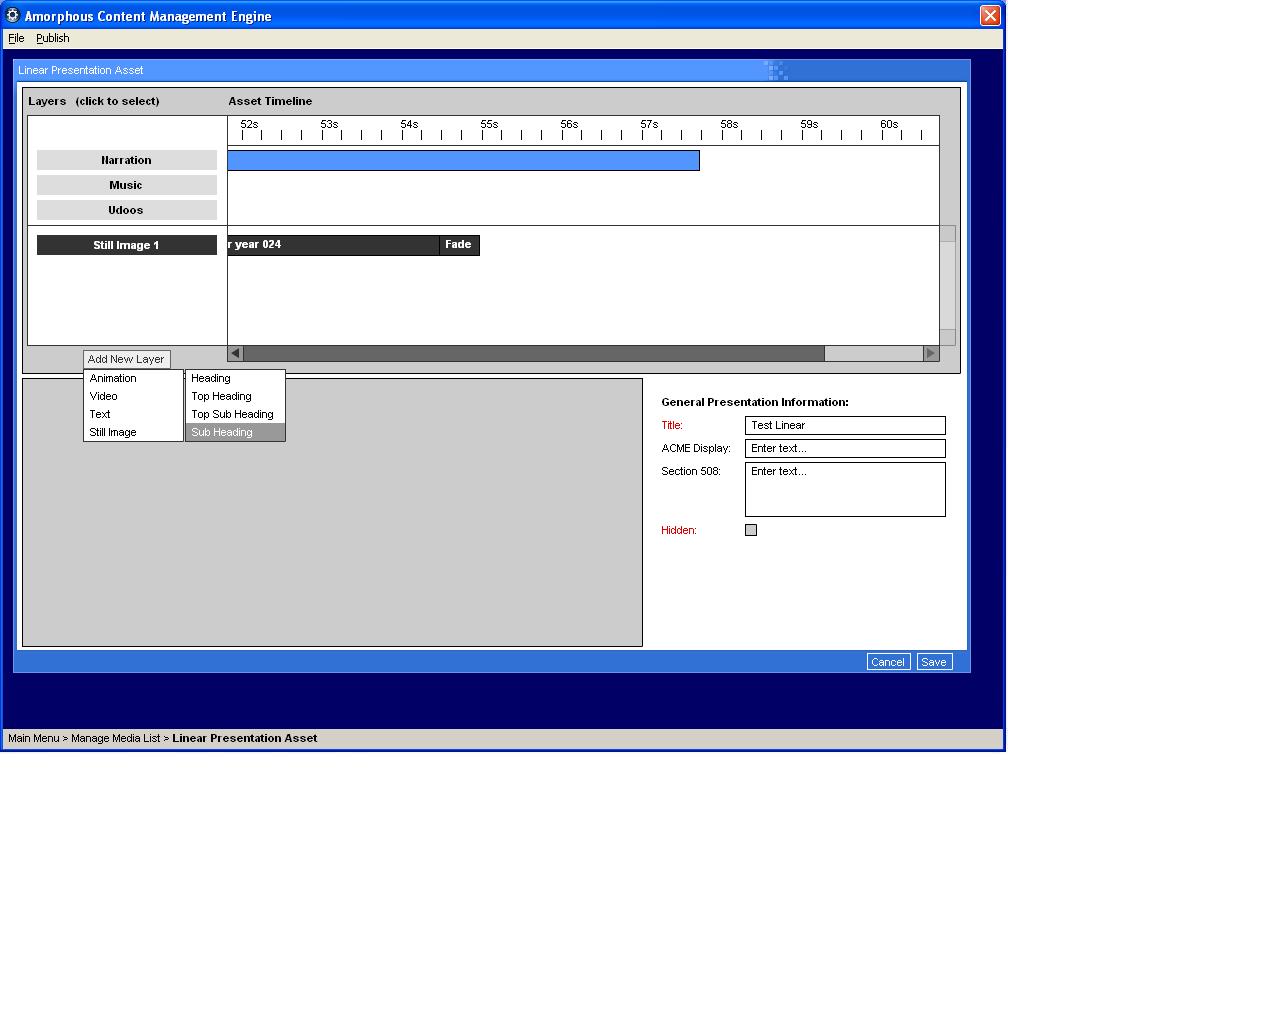
- Click the “Add New Layer” button
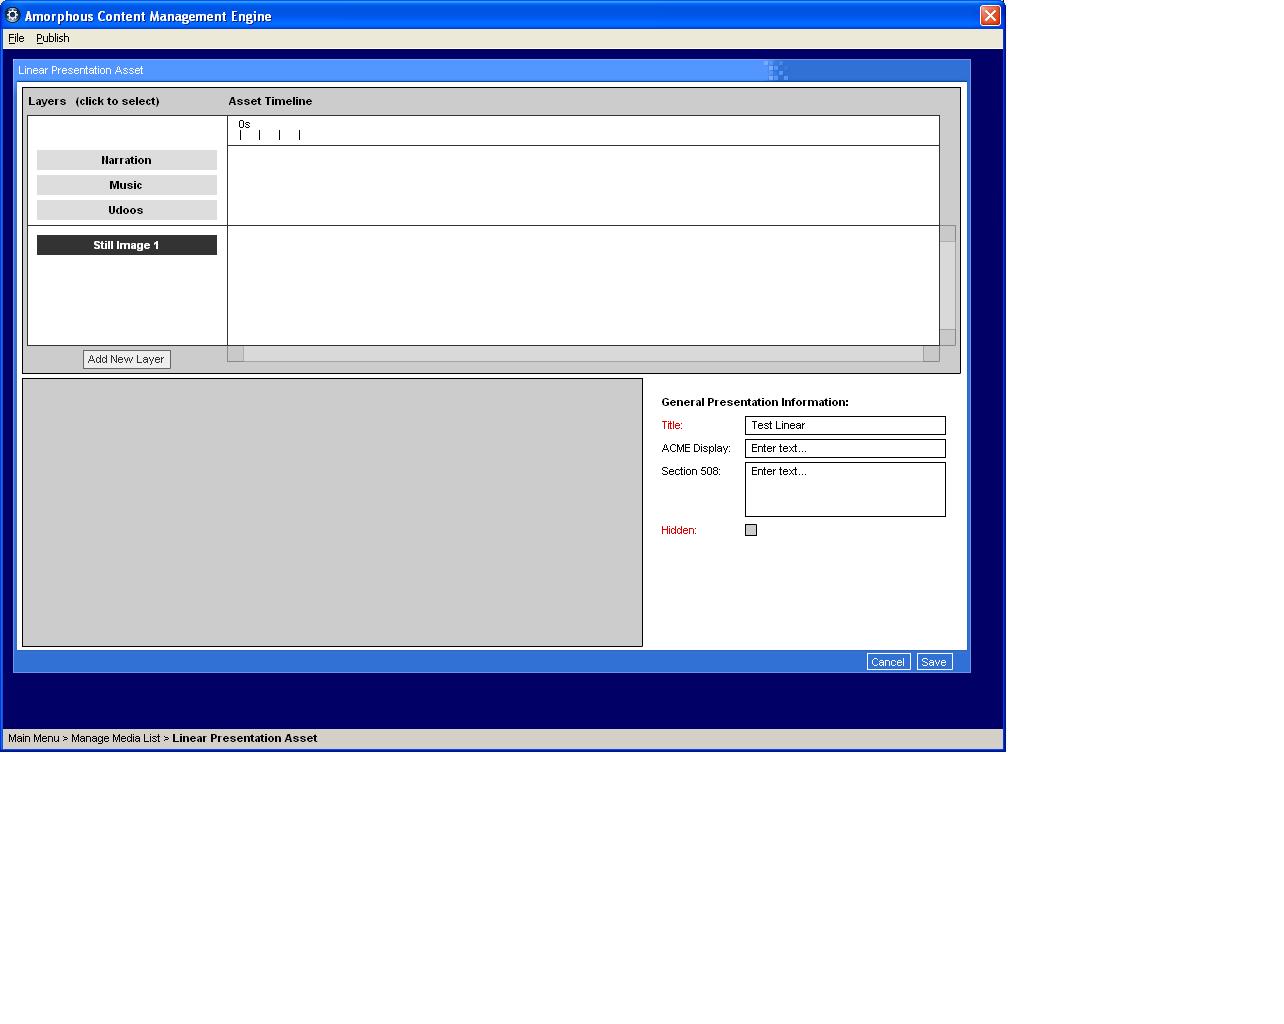
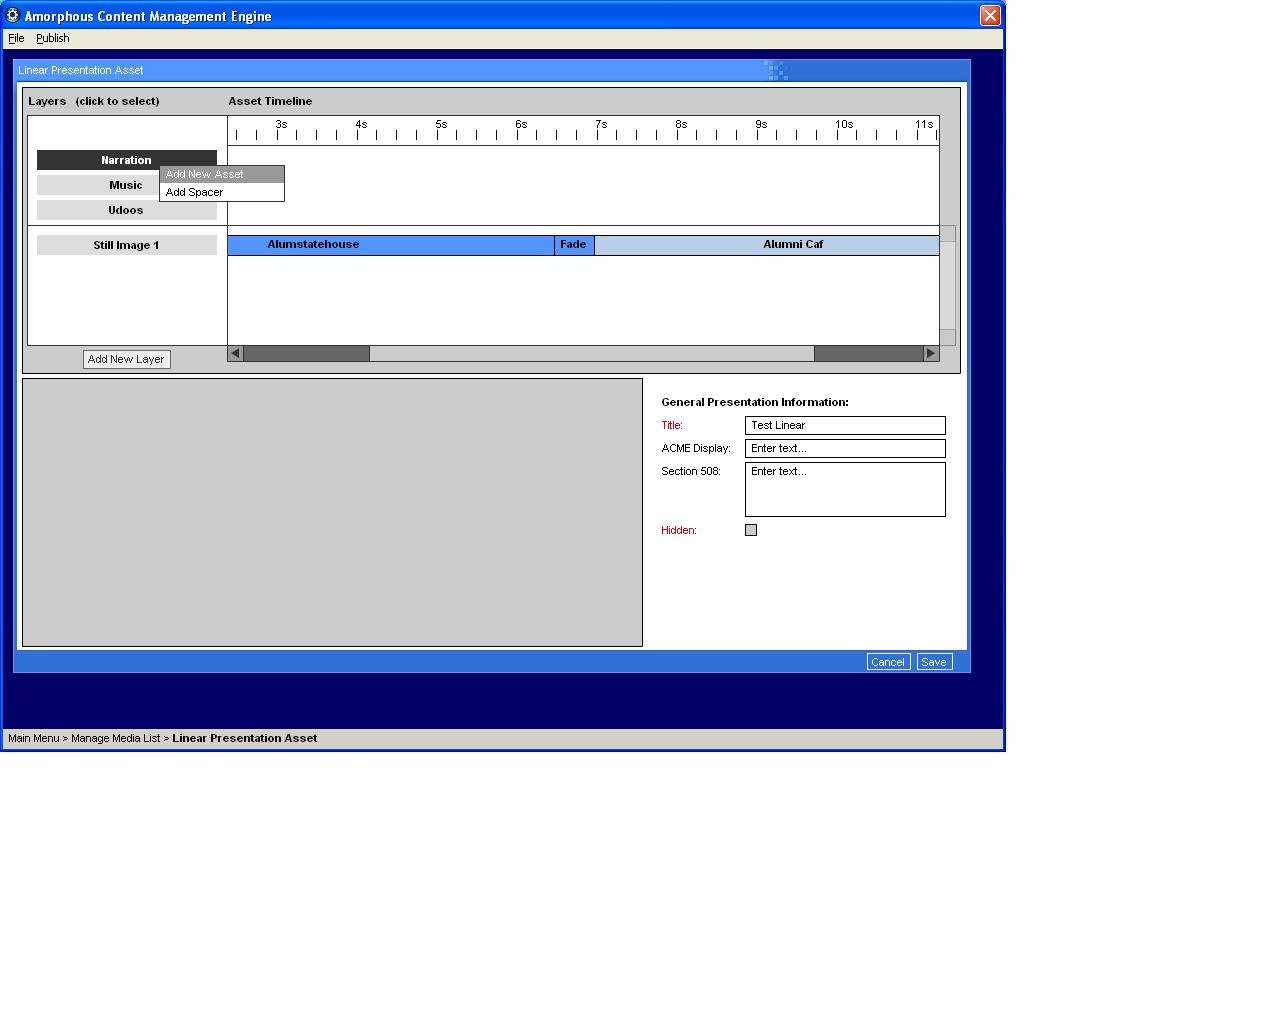
- Click on "Still Image". The "Still Image 1" Layer button should now appear under the Udoos Layer button next to the timeline.
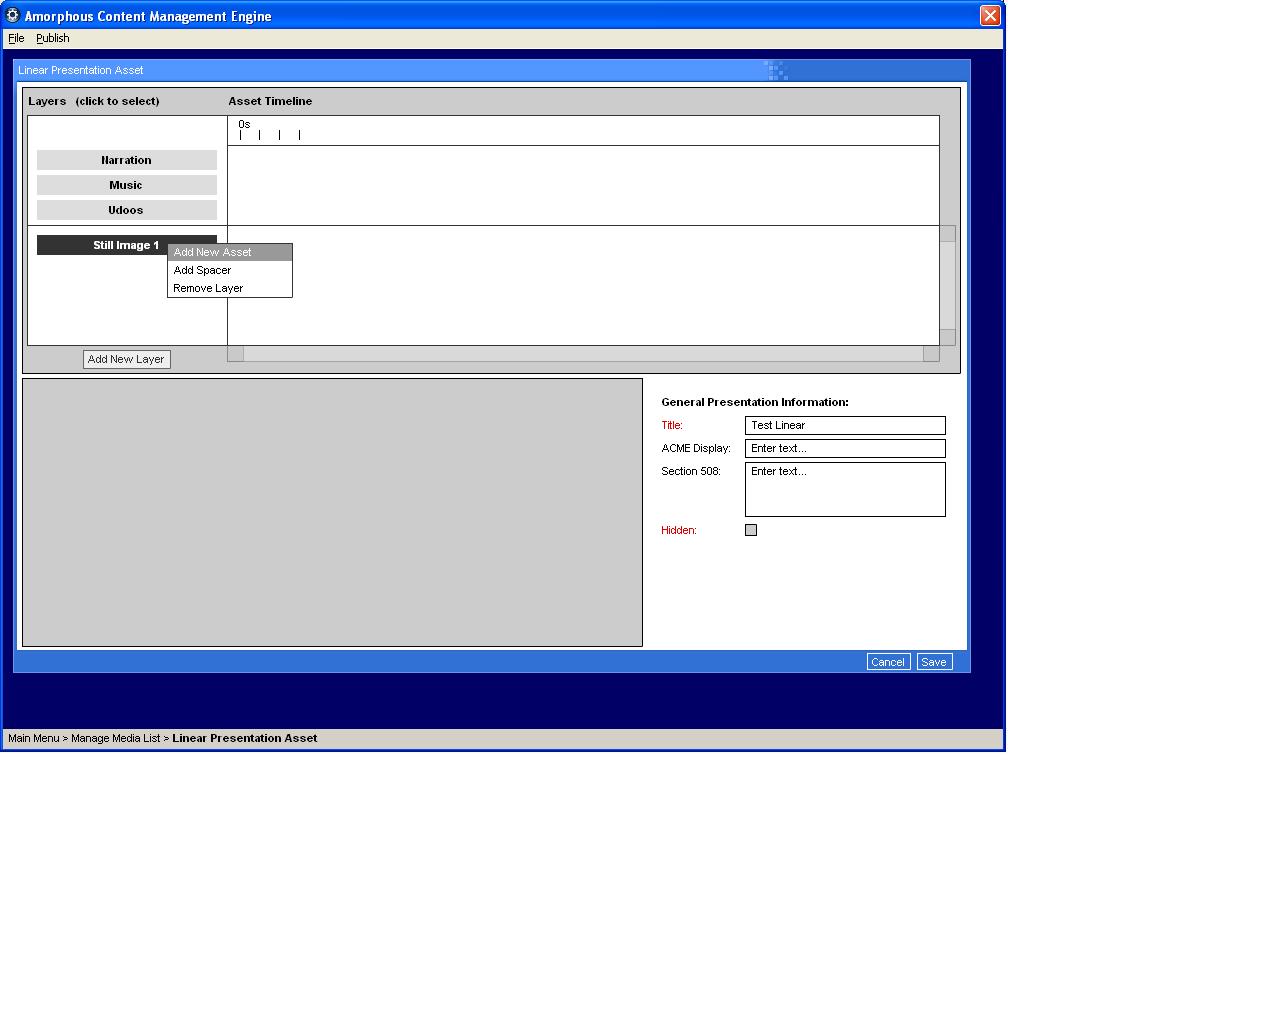
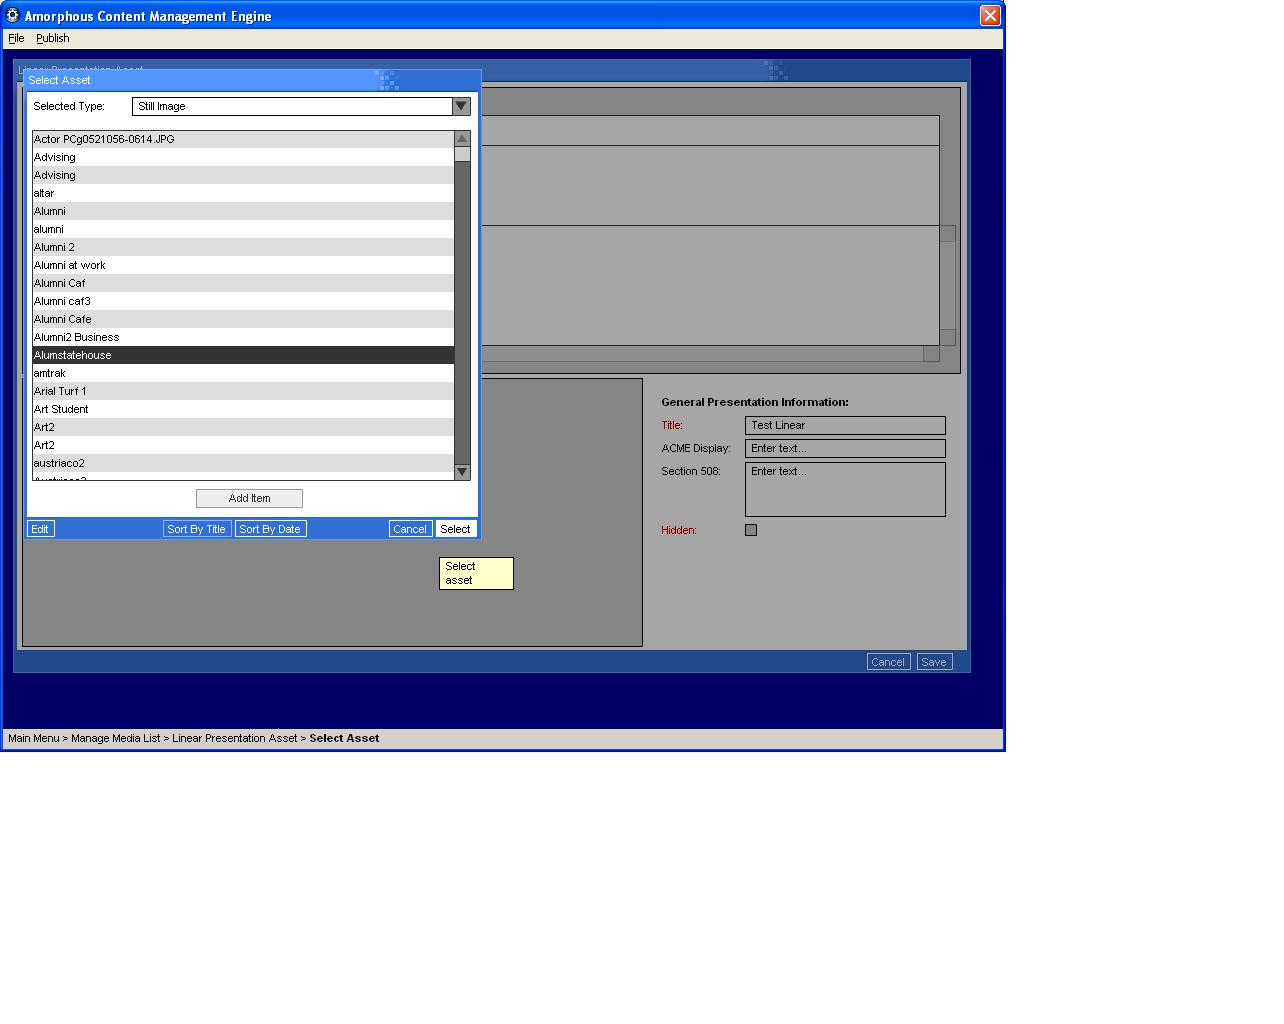
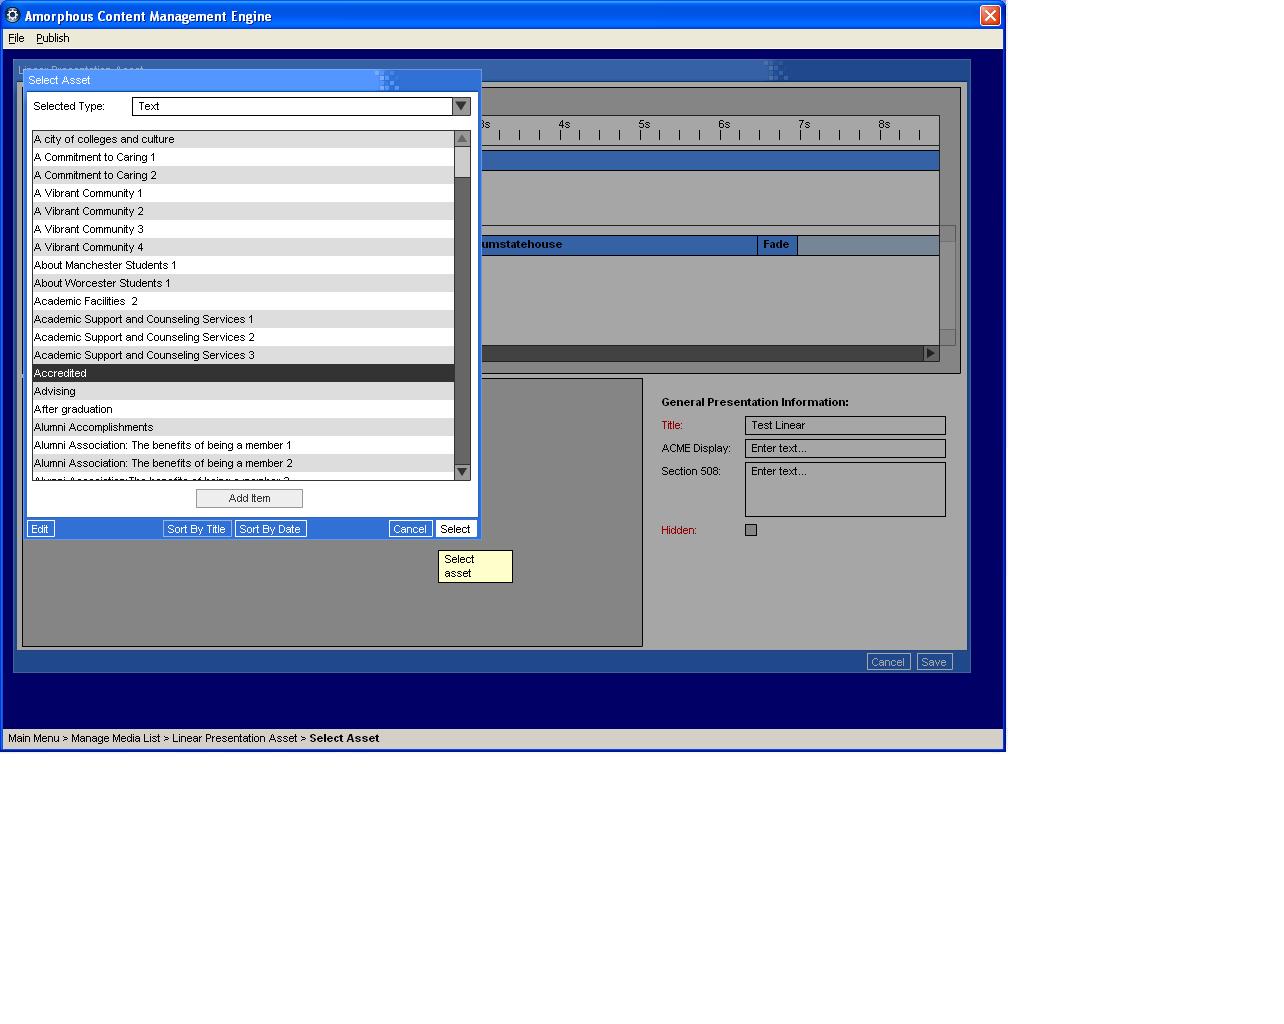
- Click on the "Still Image 1" button. Of the 3 menu options, Click on "Add New Asset"
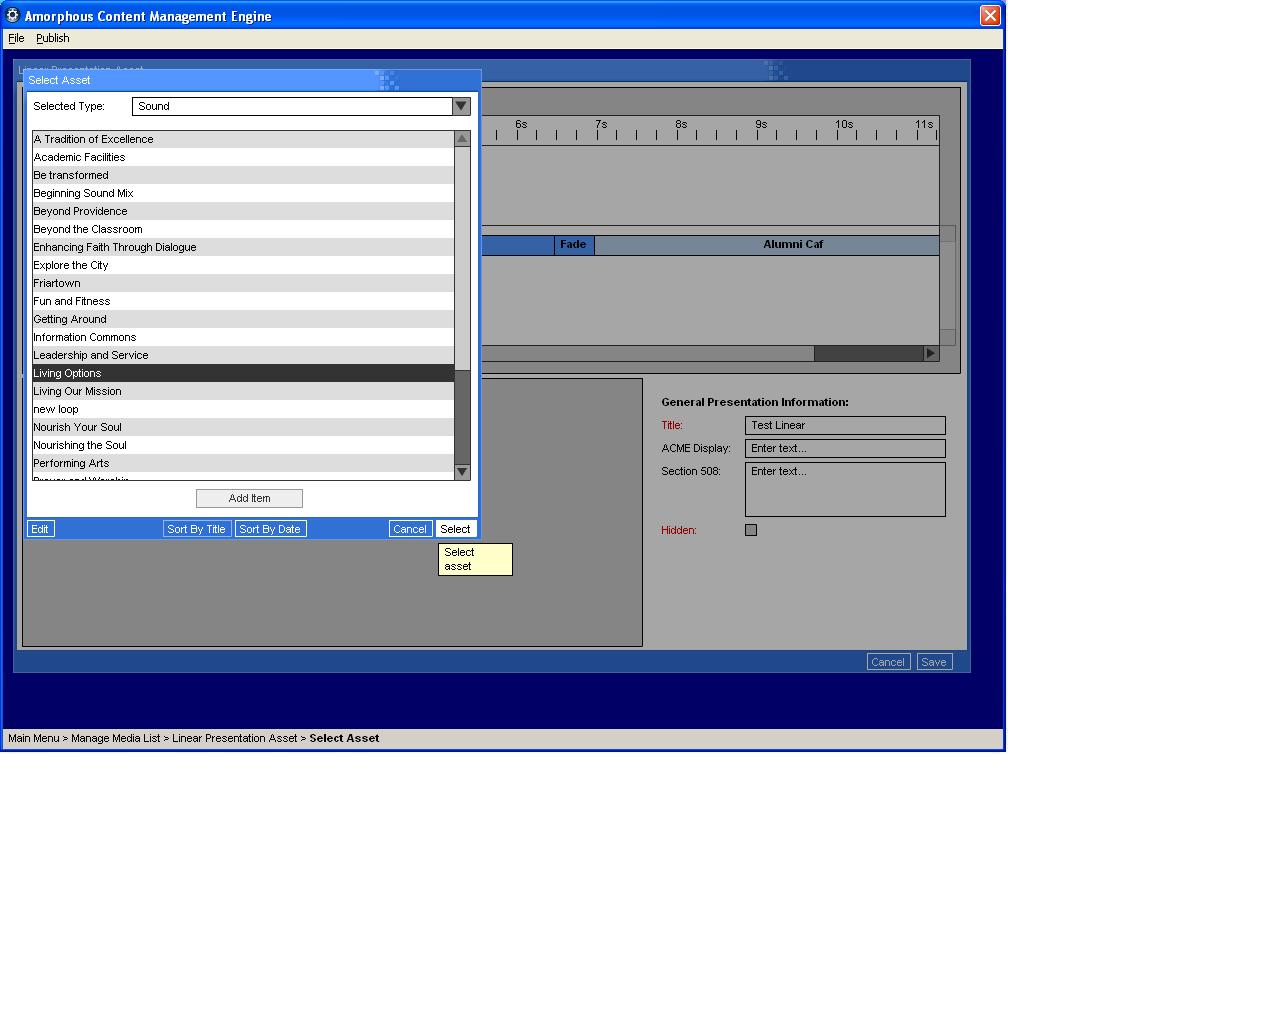
- Click on an image from the Still Image list that is now being displayed and then click on the Select button. The window will close and an asset convention box will appear under the timeline.
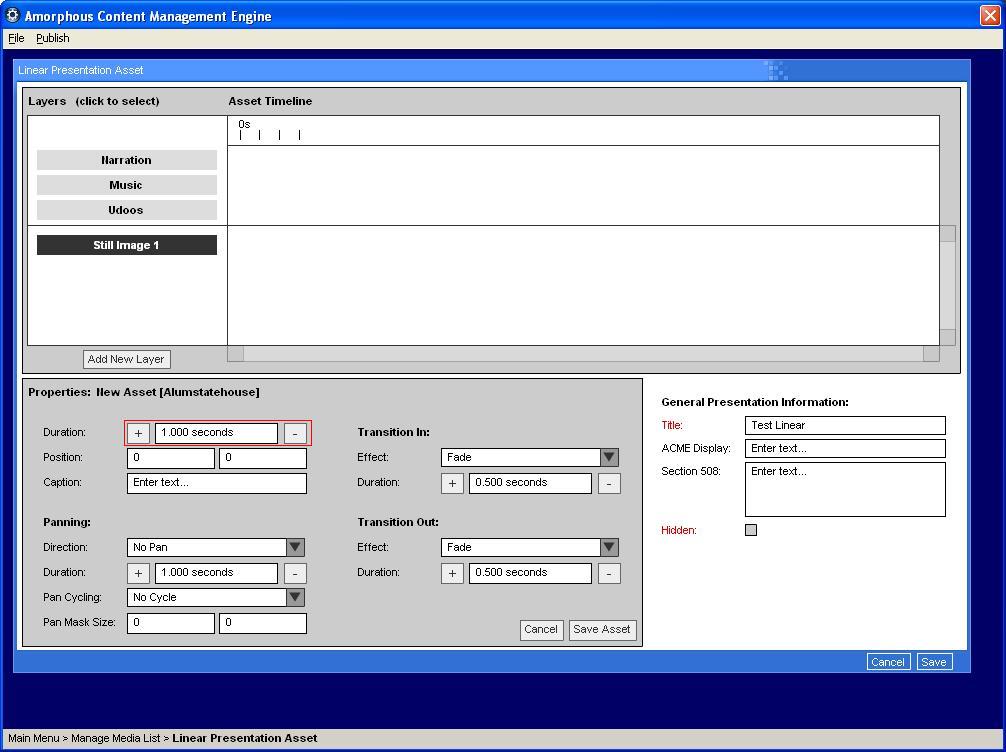
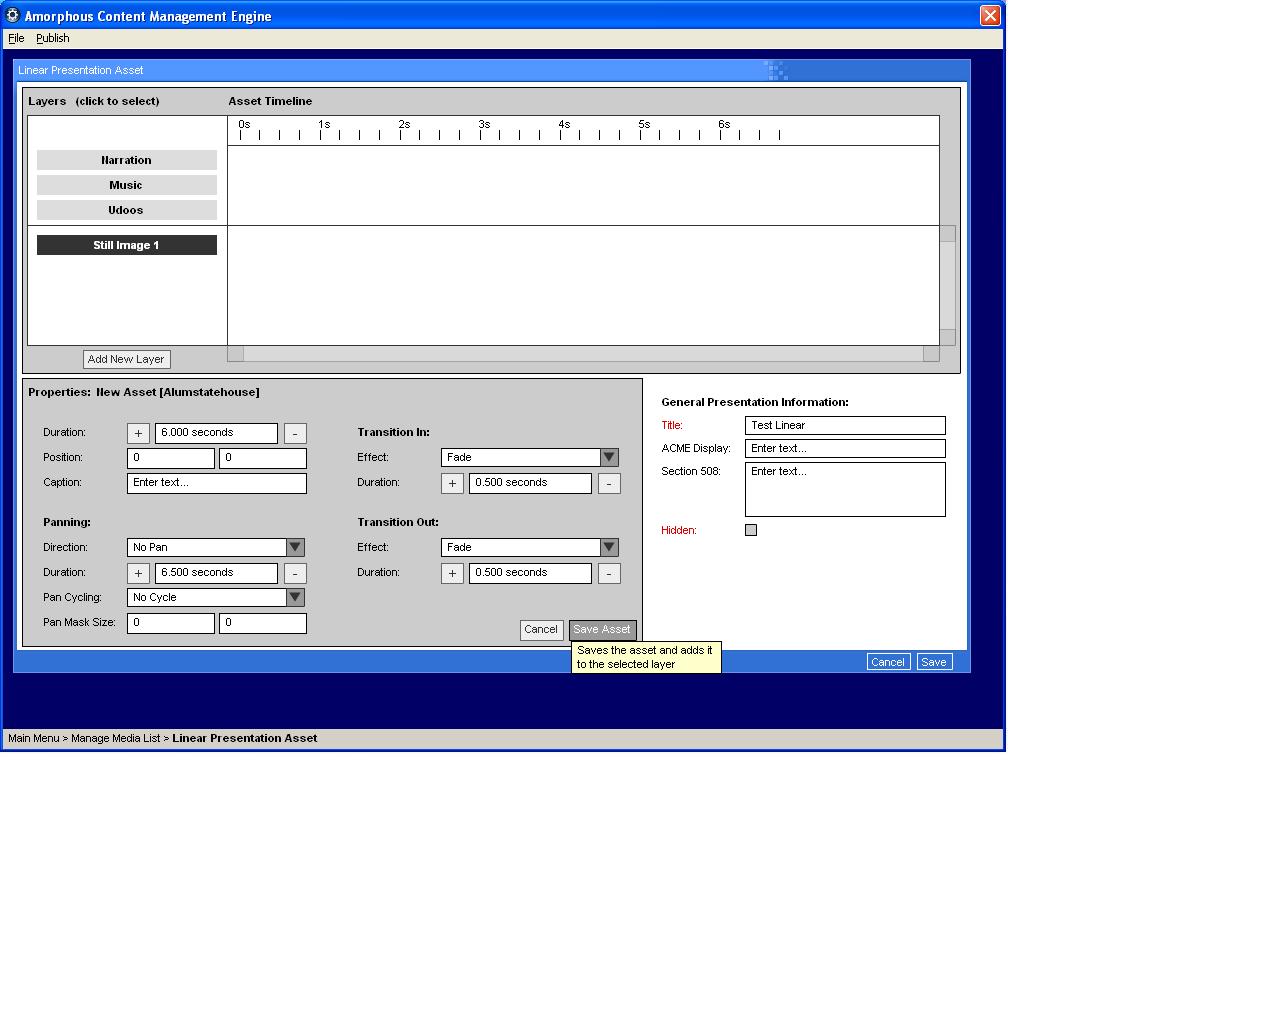
- Use the "+" and "–" keys on either side of the top right box (the Asset Duration box) to state the amount of time you wish to have the image display for (you can use the shift key to increase the rate at which the time increases or decreases to 1 second from ¼ second).
- In the Pan Direction box select the way in which you want the image to pan while it is being displayed
- Use the "+" and "–" keys on either side of middle right box (the Pan Duration box) to state the amount of time you wish to have the image panning for.
It is important that there are 2 different times, a pan time and an image duration time, if the times match then the item will start panning at the same time as the image duration time begins, and will be set to stop when the image duration time ends. If and when this happens the clip looks jarring with a jerky looking beginning and end. This therefore is something that should be avoided. Therefore if the pan duration time is longer than the image duration time it will start panning the image before the image is even displayed. This in turn will mean that it displays the pan of the image cleanly and smoothly. Therefore if one of the still images in the Linear Sequence looks to be disjointed that will most likely be because the pan duration is time needs to be longer.
- You can also set how many times you want the image to pan using the drop down menu in the Pan Cycling box (no cycle means that the image only pans once as it does not cycle back selecting 1 therefore means that the image pans twice).
- For the first Image you can set the type of effect and the duration of both the transition into the image and the transition out of the image. For all subsequent images only the transition out can be set, the transition in will be affected by whatever was set as the transition out of the previous image..
- To change the type of effect that is used to transition in to the image select the drop down menu located in the Transition In Effect box.
- The amount of time the effect uses to transition in can be selected using the + and - buttons on either side of the Transition In Duration box.
- To change the type of effect that is used to transition out to the image select the drop down menu located in the Transition Out Effect box.
- The amount of time the effect uses to transition out can be selected using the + and - buttons on either side of the Transition Out Duration box.
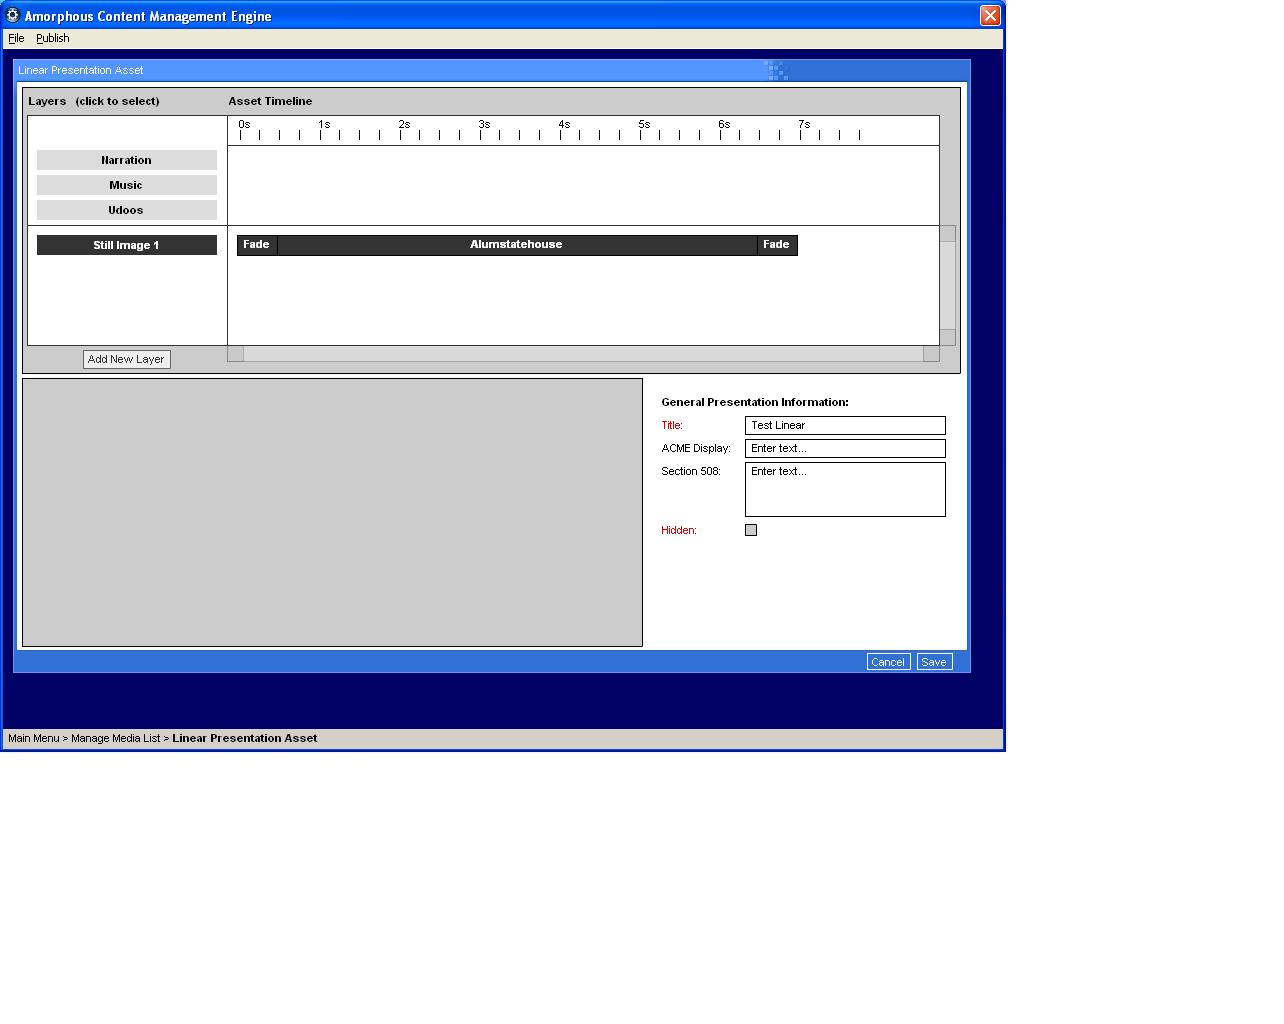
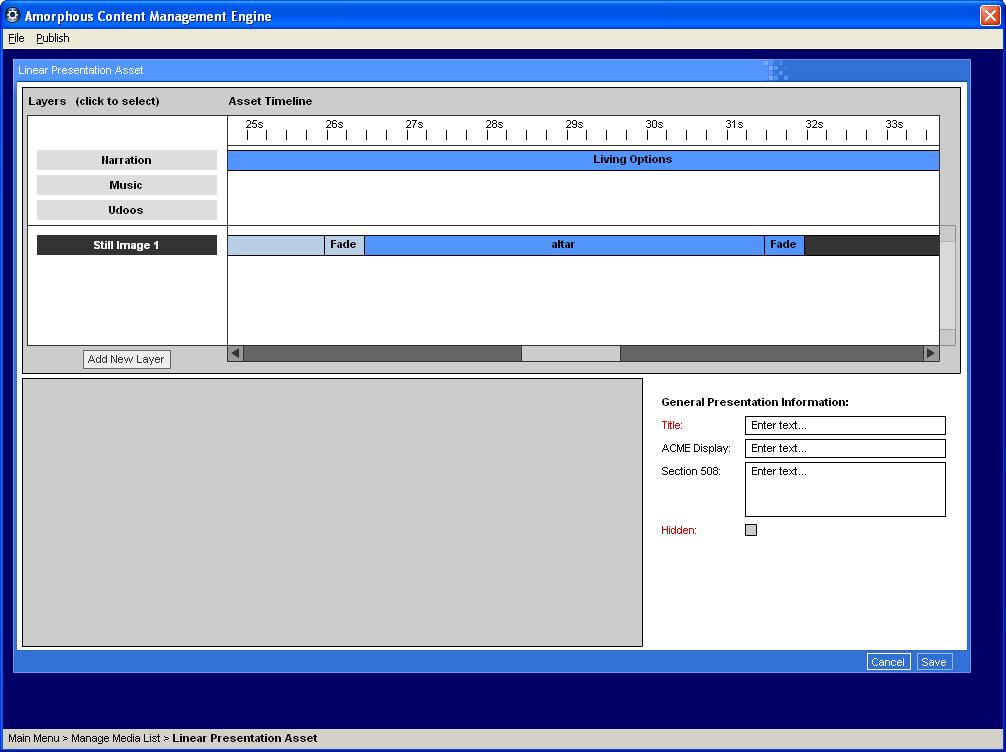
- Click on the "Save Asset" Button. The Image will appear in the timeline.
- Repeat steps 3-10 until all the Still Images are placed in the linear presentation in the correct order and for the desired length of time.
- To add a Sound Asset to a Linear Presentation:
- Click on either the "Music" or "Narration" button (both play sound files)
- Click on "Add New Asset". The Sound menu will now appear displaying all the Sound Assets that have been created.
- If the Sound Asset has not yet been created click on the "Add Item" button and create a new Sound Asset.
- Click on the desired Sound Asset and click on the "Select" button. The Sound Asset will now display in the Linear Presentation timeline.
- To add a Text Asset to a Linear Presentation:
- Click on the “Add New Layer” button.
- Click on Text.
- Click on Sub Heading. The Sub Heading button will appear below the Still Image 1 button in the Layer list.
- Click on the Sub Heading button Below the Still Image 1 button.
- Click on “Add New Asset” (a menu of the Text Assets) will appear.
- Click on the Text Asset you want to use and click on the "Select" button.
- Use the + and - keys state how long you wish the text to display for in the duration box.
- Click on the "Save Asset" button.
- If you want to display two or more Text Assets in a Linear Presentation the space in between when one Text Asset is displayed and when another Text Asset is displayed is filled with a "Spacer". To add a "Spacer":
- Click on the Sub Heading button.
- Click on "Add Spacer".
- Use the "+" and "-" buttons on either side of the Spacer Duration box to state how long you want their to be a gap between 1 piece of text and another.
- Click on the "Save Asset" Button. The Spacer will now appear in the Timeline.
- Repeat steps 7-4 through 7-9 until all the text is in the Linear Presentation.
- To add a video to a Linear Presentation"
- Click the “Add New Layer” button.
- Click on the Video option (now a Video 1 button will appear under the Udoos button).
- Click on the Video 1 button, a list of options will now appear.
- Click on the “Add New Asset” option from the Video 1 list (A new window will open showing all the video assets you have created).
- If the Video Asset you wish to use has not yet been created click on the "Add Item" button and create a new Video Asset.
- Click on the video you wish to use.
- Click on the “Select” button in the bottom right hand corner of the window.
- Click on the “Save Asset” button in the bottom right hand corner of the gray window. The video will now appear on the timeline.
- Lastly click on the "Save" button in the bottom right hand corner of ACME.
- Repeat stages 3 through 9 until all the Linear Presentations you wish to create at this time have been created.
- Once all the Linear Presentations that you wish to create have been created click on the "Close" button in the bottom right hand corner of the Manage Media List window. This will return you to the beginning of ACME.
To Make Changes to a Linear Presentation Asset:
To change the title of a Linear Presentation or to alter any part of the Linear Presentation follow the instructions below.
- Click on the “Manage Media” button.
- Change the Selected Type to "Linear Presentations".
- Select the Linear Presentation Asset you wish to make changes to.
- Click on the "Edit" button. The Linear Presentation window will now open showing the set up of the Linear Presentation Asset you have selected.
- To change the Sound Asset in the Linear Presentation Asset.
- Click on the line inline with the Sound Asset in the Linear Presentation Timeline. A list of options will appear.
- Click on Replace asset.
- Select the Sound Asset you wish to replace the old Sound Asset with.
- Click on the select button.
- Click on the "Save Asset" button.
- To change the title of the Linear Presentation Asset:
- Click on the inside of the "Title" box.
- Change the title to the new desired text.
- To change a spacer:
- Click on the Spacer in question.
- Choose the option you wish to use to alter the spacer.
- To change the length of the spacer:
- Select Edit Asset.
- Use the "+" and "-" keys to alter the length of the spacer.
- Click on the "Save Asset" button.
- To move the spacer one position to the right if it is not already the rightmost asset on the list..
- Select "Move Asset Right".
- To move the spacer one position to the left if it is not already the leftmost asset on the list.
- Select "Move Asset Left".
- To insert a new spacer directly before the spacer
- Select "Insert Spacer Before"
- Use the "+" and "-" keys to alter the length of the spacer.
- Click on the "Save Asset" button.
- To insert a new Text Asset before the spacer.
- Create the Text Asset you wish to add if you have not already.
- Select "Insert New Asset Before"
- Select the new Text Asset you wish to use from the Text Asset list.
- Click on the "Select" button.
- To remove a spacer:
- Click on Remove Asset
- In the new window that appears click on OK.
- To change a Sub Heading:
- Click on the Sub Heading in question.
- Choose the option you wish to use to alter the text.
- To change the length of the Sub Heading:
- Select Edit Asset.
- Use the "+" and "-" keys to alter the length of the Text Asset.
- Click on the "Save Asset" button.
- To replace a Sub Heading:
- Select "Replace Asset" .
- If you have not already created the new Sub Heading click on the "Add Item" button. A text asset window will appear.
- Insert the text to be displayed in the "Text" box (remember to use ## to signify a line break).
- Enter the title of the heading in the "Title" box.
- Click on the save button. the text asset list will return to the foreground.
- Select the new text asset you wish to use.
- Click on the "select" button.
- Use the "+" and "-" keys to alter the length of the Text Asset.
- Click on the "Save Asset" button.
- To move the Sub Heading one position to the left if it is not already the leftmost asset on the list.
- Select "Move Asset Left".
- To move the Sub Heading one position to the right if it is not already the rightmost asset on the list..
- Select "Move Asset Right".
- To insert a new Sub Heading before the Sub Heading:
- Select "Insert New Asset Before"
- If you have not already created the new Sub Heading click on the "Add Item" button. A text asset window will appear.
- Insert the text to be displayed in the "Text" box (remember to use ## to signify a line break).
- Enter the title of the Sub Heading in the "Title" box.
- Click on the save button. the text asset list will return to the foreground.
- Select the new text asset you wish to use.
- Click on the "select" button.
- Use the "+" and "-" keys to alter the length of the Text Asset.
- Click on the "Save Asset" button.
- To insert a spacer before the Sub Heading:
- Select "Insert Spacer Before".
- Use the "+" and "-" keys to alter the length of the spacer.
- Click on the "Save Asset" button.
- To remove the Sub Heading
- Select Remove Asset.
- In the new window that appears click on OK.
- To make changes to a still image:
- To change the duration that a still image is displayed for:
- Click on the Still Image Asset in question.
- Select "Edit Asset". The Still Images options will now appear like they did once you first selected the image.
- Use the "+" and "-" buttons attached to the Asset's Duration box to change the length of time that the image is displayed for.
- Click On the "Save Asset" button.
- To change the direction and time the image pans
for:
- Click on the Still Image Asset in question.
- Select "Edit Asset".
- Use the drop down menu that makes up the Panning Direction box to select the new direction in which you the image to pan.
- Use the "+" and "-" buttons attached to the Panning Duration box to change the length of time that the image is set to pan for.
- Click on the "Save Asset" button.
- To change the image's fade out settings.
- Click on the Still Image Asset in question.
- Select "Edit Asset"
- To change the way in which the image is replaced by the next one in the sequence change the effect in the the drop down menu for the Transition Out Effect box.
- To change the length of time that the Transition Out needs to complete the desired Transition Out Effect use the + and - buttons attached to the Transition Out Duration box.
- Once the desired changes have been made click on the "Save Asset" button.
- To move a still image left or right in the timeline:
- Click on the Still Image Asset in question.
- Select "Move Asset Left" or "Move Asset Right" until the image is in the desired spot in the timeline.
- Click on the "Save Asset" button.
- To insert a new image at a specific point in the timeline:
- Click on the Still Image Asset that is where you want the new still image to be located.
- Select "Insert New Asset Before", the Still Image Menu will now appear.
- Select the desired Still Image and click on the "Select" Button.
- Set the desired settings for the Still Image (Image display time, panning direction, panning duration, transition out effect, and transition out duration).
- Click on the "Save Asset" button.
- To change the crop setting for the Pan shot:
- Click on the Still Image Asset in question.
- Select "Replace Asset"
- Find and click on the Still Image Asset.
- Click on the "Edit" button. The Still Image window will open up.
- Change the variation to the correct Linear variation depending on the desired Pan.
- Click on the "Edit" button.
- Click on the gray area on the side of the image. the Crop outline will now disappear.
- Re crop the image to a preferred crop.
- Click on the "Save" button.
- Click on the other "Save" button.
- Make sure the Still Image Asset is highlighted and then click on the "Select" button.
- None of the Linear Presentation properties will have changed, so if any need to be edited they can be at this time.
- Click on the "Save Asset" button.
- To remove a Still Image Asset from the Linear Presentation:
- Click on the desired Still Image Asset.
- Select Remove Asset.
- Click on "OK" in the warning window that appears.
- To make changes to a Video Asset in a Linear Presentation:
- Click on the line inline with the video button. A list of options will appear.
- Click on Remove asset.
- From the new window Click OK.
- Click on the video button.
- Click on "Add New Asset".
- Select the video you wish to replace the older video with.
- Click on the select button.
- Click on the "Save Asset" button.
- Once All the desired changes have been made click on the "Save button in the bottom Right hand corner of the ACME window.
To Assign a Linear Presentation Asset to a Media Udoo:
For a Linear Presentation Asset to display inside a Media Udoo the Linear Presentation Asset must be assigned to the Media Udoo.
- Click on the “Manage Media” button.
- Change the Selected Type to "Linear Presentations".
- Select the desired Linear Presentation Asset from the list of Linear Presentation Assets.
- Click on the “Assignments” button. The Assignments window will now open up.
- Change the Selected Type to "Media Udoo".
- Click on the name, or the box next to the name of the Media Udoo you wish the Linear Presentation Asset to be assigned to so that a check mark appears in the box.
- Click on the “Save” button in the bottom right hand corner of the window.